Simplified File Uploads to NetSuite: A Practical Guide Using RESTlet and Python
Discover how to upload files to NetSuite's File Cabinet using a RESTlet and Python, utilizing the Client Credentials Flow (Machine to Machine) Access Token. This guide will help you create a RESTlet in NetSuite and develop a corresponding Python client, streamlining the file upload process and potentially enhancing your workflow.

Create the Authentication Tokens
Prerequisites
Before creating authentication tokens, you need to generate a self-signed certificate that meets NetSuite's requirements for the OAuth 2.0 client credentials flow. Use the following command to generate the certificate:
openssl req -new -x509 -newkey ec -pkeyopt ec_paramgen_curve:prime256v1 -nodes -days 365 -out public.pem -keyout private.pem
Follow NetSuite's guide for creating a mapping for the client credentials flow.
Creating a New Integration
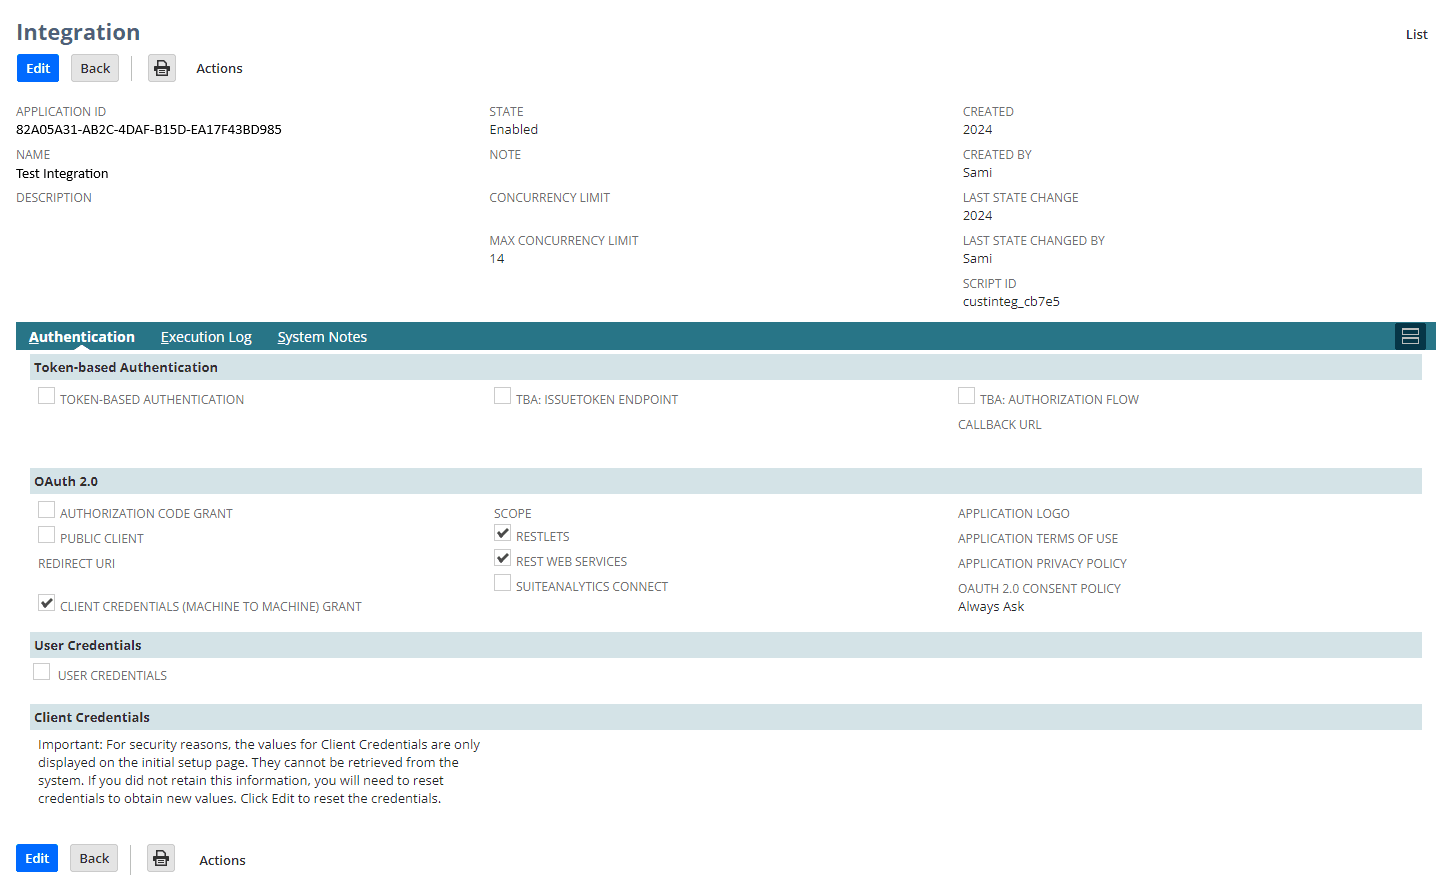
In NetSuite, navigate to Setup -> Integrations -> Manage Integrations -> New.
Integration Configuration
- Token-based Authentication
TOKEN-BASED AUTHENTICATION[ ]TBA: ISSUETOKEN ENDPOINT[ ]TBA: AUTHORIZATION FLOW[ ]
- OAuth 2.0
AUTHORIZATION CODE GRANT[ ]PUBLIC CLIENT[ ]CLIENT CREDENTIALS (MACHINE TO MACHINE) GRANT[✅]- Scopes:
RESTLETS[✅]REST WEB SERVICES[✅]SUITEANALYTICS CONNECT[ ]
- User Credentials
USER CREDENTIALS[ ]

After creating the integration, save the application keys, as they cannot be recovered.
Example of keys:
- Consumer Key / Client ID: 67f51f27f7fcde0c286c2b28e81fa708d532081f2f7cdc8e7b9fd0f69707b252
- Consumer Secret / Client Secret: 5ea58b0234e33905f82664736eb3b004b444fceac3ba7d1ed6ea2bc9efff0c6e
Upon completion, you will find an Application ID, for example: 82A05A31-AB2C-4DAF-B15D-EA17F43BD985.
Setup connection to the Integration
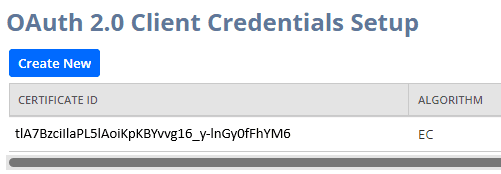
In NetSuite, navigate to: Setup -> Integration -> OAuth 2.0 Client Credentials (M2M) Setup.
- Select an Entity (a User).
- Choose the User Role.
- Select the Application (previously created Integration).
- Upload the
public keyof the previously generated certificate from the prerequisites section.
Upon completion, you will find a Certificate ID, for example: tlA7BzciIlaPL5lAoiKpKBYvvg16_y-lnGy0fFhYM6.

Deploying a RESTlet script to your Netsuite Account (SuiteScript)
To enable an external system to interact with NetSuite, you'll need to create a RESTlet script. This script acts as an endpoint that external systems can contact to perform operations such as creating, reading, updating, or deleting records in NetSuite.
The data must be encoded and decoded using base64 for both transmission and reception.
Here is the RESTlet script you can use to upload a file into NetSuite.
/**
 * @NApiVersion 2.1
 * @NScriptType Restlet
 */
define(['N/file', 'N/encode', 'N/search', 'N/log', 'N/error'], (
  file,
  encode,
  search,
  log,
  error
) => {
  /**
   * Handles the POST request to this RESTlet's entry point.
   * @param {object} requestBody - The request body containing the data to process.
   * @returns {object} A JSON response.
   */
  const post = (requestBody) => {
    try {
      const data =
        typeof requestBody === 'object' ? requestBody : JSON.parse(requestBody);

      // Decode the file content received in base64
      const content = encode.convert({
        string: data.content,
        inputEncoding: encode.Encoding.BASE_64,
        outputEncoding: encode.Encoding.UTF_8,
      });

      response(
        'FILE_CREATED',
        `${createOrOverwriteFile(data.filename, content, data.folderid)}`
      );
    } catch (e) {
      log.error({ title: 'Error', details: e });
      throw error.create({ name: 'FAILURE', message: e, notifyOff: true })
        .message;
    }
  };

  /**
   * Create a new file or overwrite an existing one with the same name.
   * @param {string} filename - The name of the new file.
   * @param {string} content - The content of the new file.
   * @param {string} folderid - The ID of the folder where the new file will be created.
   * @returns {string} The ID of the new file.
   */
  const createOrOverwriteFile = (filename, content, folderid) => {
    const fileObj = file.create({
      name: filename,
      fileType: file.Type.PLAINTEXT,
      contents: content,
      folder: folderid,
    });
    return fileObj.save(); // return id
  };

  /**
   * Return JSON Response to Client
   * @param {string} status
   * @param {string} message
   * @returns a JSON Response.
   */
  const response = (status, message) => {
    return JSON.stringify({ status: status, message: message });
  };

  return { post };
});
Deploy the RESTlet using the following steps:
- Upload the javascript file to the File Cabinet.
- Create a script associated with that file.
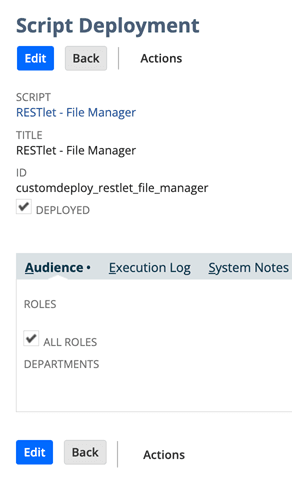
- Create a script deployment associated with the script. Make sure to assign your role to the Deployment.

Make a note of the Script ID and the Script Deployment Version, as you will need them later.
Extra: Checking If the File Already Exists (Optional)
If you need to determine if a file already exists in a specific folder, you can create a search on the folder record type with join on the file column.
Here's an example of how you can accomplish this:
const fileSearchResult = search
  .create({
    type: search.Type.FOLDER,
    filters: [
      ['internalid', 'is', folderId],
      'AND',
      ['file.name', 'is', filename],
    ],
    columns: [search.createColumn({ name: 'internalid', join: 'file' })],
  })
  .run()
  .getRange({ start: 0, end: 1 });
Uploading files into the NetSuite File Cabinet! (Python)
You will need to create a new folder that contains an .env file to store your credentials and a Python .py file that will serve as the API client.
Also, ensure you have a file ready that you want to upload into the File Cabinet. Let's call it fileToUpload.js.
Setting up the .env File
Create a .env file in your project directory with the following content.
Be sure to replace the values with your actual credentials, as the ones shown here are examples.
CLIENT_ID=67f51f27f7fcde0c286c2b28e81fa708d532081f2f7cdc8e7b9fd0f69707b252
CLIENT_SECRET=5ea58b0234e33905f82664736eb3b004b444fceac3ba7d1ed6ea2bc9efff0c6e
ACCOUNT_ID=8886611-sb1
APP_ID=82A05A31-AB2C-4DAF-B15D-EA17F43BD985
CERTIFICATE_ID=tlA7BzciIlaPL5lAoiKpKBYvvg16_y-lnGy0fFhYM6
PRIVATE_KEY_PATH=/Users/someuser/private.pem
RESTLET_SCRIPT_ID=1555
RESTLET_SCRIPT_DEPLOY_ID=1
ACCOUNT_IDis the account id of your Netsuite Account. You can find it in your Netsuite Account URL (e.g. https://8886611-sb1.app.netsuite.com). If it's a sandbox, it should be followed with something like-sb1.APP_ID(Application ID) is found in the Integration you've just created.PRIVATE_KEY_PATHis the local path to your private key, which is related to the public key you've just uploaded to the integration connection.RESTLET_SCRIPT_IDandRESTLET_SCRIPT_DEPLOY_IDare the IDs that you will find after deploying the RESTlet to your Netsuite Account.
Performing the POST Request in Python
To get started, you will need to install the necessary packages. Run the following commands:
pip install python-dotenv
pip install requests
pip install pyjwt
pip install cryptography
Create a new Python file (client.py) and include the necessary imports:
import os
import json
import base64
from datetime import datetime, timedelta, timezone

import jwt
import requests
from dotenv import load_dotenv

# Load environment variables from the .env file
load_dotenv()
We will retrieve an Access Token from NetSuite using the OAuth 2.0 Client Credentials Grant Type. This involves loading environment variables, preparing a JWT payload, reading our private key, and generating a JWT token. Finally, we'll send a POST request to NetSuite to obtain the Access Token.
"""
Retrieve the Access Token from NetSuite using the client_credentials
(machine to machine) grant type through OAuth2.
"""

# Read the .env file
client_id = os.getenv('CLIENT_ID')
account_id = os.getenv('ACCOUNT_ID')
certificate_id = os.getenv('CERTIFICATE_ID')
token_url = f'https://{account_id}.suitetalk.api.netsuite.com/services/rest/auth/oauth2/v1/token'

payload = {
    'iss': client_id,
    'scope': 'restlets,rest_webservices',
    'aud': token_url,
    'exp': datetime.now(timezone.utc) + timedelta(seconds=1200),
    'iat': datetime.now(timezone.utc),
}

# Fetching our private key...
private_key = ''
private_key_path = os.getenv('PRIVATE_KEY_PATH')
if (private_key_path is not None and private_key_path != ''):
    with open(private_key_path, 'rb') as f:
        private_key = f.read()
else:
    raise Exception('Missing PRIVATE_KEY_PATH in ENV')

# Generating the JWT token...
encoded_jwt = jwt.encode(payload, private_key, algorithm='ES256',
                         headers={'kid': certificate_id})

# Creating a session...
params = {
    'grant_type': 'client_credentials',
    'client_assertion_type': 'urn:ietf:params:oauth:client-assertion-type:jwt-bearer',
    'client_assertion': encoded_jwt,
}

# Sending the POST Request to Netsuite
response = requests.post(token_url, params=params)
if response.status_code != 200:
    res = json.dumps(response.json(), indent=2)
    raise Exception(f'Error connecting to NetSuite {res}')

access_token = response.json()['access_token']

print(access_token)  # SUCCESS!
We have successfully obtained the access token from NetSuite through our established connection to the Integration Application configured earlier.
Now, leveraging that access token, we can remotely post a file into the File Cabinet.
Note the folder_id, you need to specify in which folder you want to upload your file in.
# Use the retrieved access token to call our RESTlet script.

# RESTlet script deployment information
script_id = os.getenv('RESTLET_SCRIPT_ID')
script_deploy_id = os.getenv('RESTLET_SCRIPT_DEPLOY_ID')

# you need to know the folder internal id you want to upload the file to.
folder_id = -15 # this is the SuiteScripts root folder id.

# Read your file content

# notice the binary data format, we also read the file with 'rb' (read binary)
file_content = b''
file_name = ''
try:
    with open('fileToUpload.js', 'rb') as file:
        file_name = os.path.basename(file.name)  # get file name
        content = file.read()
        file_content = content if content is not None else b''
except IOError:
    raise Exception('An error occurred while reading the file')

# Access Token in the Request Header
headers = {
    'Authorization': f'Bearer {access_token}',
    'Content-Type': 'application/json'
}

# Data sent to the RESTlet script
data = {
    'filename': file_name,
    'folderid': folder_id,
    'content': base64.b64encode(file_content).decode('utf-8')
}

# POST request
restlet_endpoint = f'{account_id}.restlets.api.netsuite.com/app/site/hosting/restlet.nl'
response = requests.post(
    f'https://{restlet_endpoint}?script={script_id}&deploy={script_deploy_id}',
    headers=headers, data=json.dumps(data))
if response.status_code != 200:
    res = json.dumps(response.json(), indent=2)
    raise Exception(f'Error: {res}')
Once you run the Python file, it will upload your specified file into the File Cabinet in NetSuite, within the specified folder!
Note: Please be cautious as it will overwrite any existing file in the specified folder with the same name.
python client.py
Conclusion
In conclusion, we have successfully created an integration app in NetSuite that leverages the client credentials flow and a local self-signed certificate for secure authentication. We have implemented a RESTlet in NetSuite to serve as an endpoint, allowing us to interact with NetSuite's File Cabinet. Additionally, we have developed a Python client to communicate with the RESTlet, enabling us to upload a file into the File Cabinet in NetSuite. This integration can enhances automation and streamlines file management processes.